I went to the Bearing and Chain store in town and picked up two pulleys and taper lock bushings for my small Diesel engine and DC starter/generator for my DC generator project. I got both the pulleys installed and ready to go. Now all I need to do is bust out the TIG welder and sawzall and build a frame for both components. One pulley is 6" and the other is 4". I wanted to do a 2 to 1 but the small pulley was too fat to allow good grip on the motor shaft so I went with a taller pulley and narrower one that will allow full grip on the motor shaft. I should have enough grip to at least make a test to see how well this system will work. If it produces good power I may even try to see how well the motor runs with this connected directly and use the clutch and throttle of the generator to adjust speed. I will need to provide good cooling for the little DC generator. It is mostly for doing stationary DC charging for my VW Roadster setup. I am truly hoping for good results since my controller can do any DC source. I can use the throttle for the engine to regulate the generator and keep it at a constant speed. DC motor should pump out 36 volts and up to 400 amps of oomph.
Pete :)
I'll get some pictures tomorrow when I get home. I'll also get my welder and supplies ready for the frame build. Pics are always good. I'll need to build a way to hold the motor steady too. Should be pretty easy. I have pretty crude tools here so don't expect super clean looking stuff. I'd do thick aluminum but don't have any of that so I must use square steel stock and flat plate for the adjustable base. The electric motor will be on the adjustable base. Diesel will not.
Friday, August 30, 2013
Thursday, August 29, 2013
CALB SE
Looks like I found some more CALB SE cells for my VW Roadster build. This will be a welcome find. I plan on using 60 100 AH Cells to give me 192 volt nominal system. I will run the voltage at 156 volts and my motor amps at 800 and my battery amps at 500 amps. This will give me a voltage sag pad and I should get a solid 156 volts even under load. I may have to limit the voltage to 144 or even 120 volts. But I will be able to utilize my controller as a charger and if I use a dedicated 120 volt 200 amp circuit I can plug in and do some fast charging. I will need a nice inductor but I now have that and should get up to 75 amp charging from that into the cells and 215 volts for charging. Before I do that I will do a charge setup for DC charging to see if my Diesel DC generator will work for 120 volt charging and 100 amp current levels to charge in short order. I do expect some heat.
I do have my funds for my AC-75 for the Porsche 914. Soon.
Pete :)
I do have my funds for my AC-75 for the Porsche 914. Soon.
Pete :)
Sunday, August 25, 2013
914 Lives
After getting my tires I took my car to work and back. The car ran like total crap. Had to work it with toe and heel to keep the idle up. It sucked way too much gas for the drive then after I got home I just could not get it going again. So another week and a half mucking and futzing around with the car it finally started again but still ran like crap. I now have my book and I kept looking at what I have done and everything else and just could not figure out what was wrong. There are a set of points specific for the fuel injection and I decided to take out the distributor to have a look. These points are not the regular points for the spark plugs. But when I got the distributor off I noticed that the points were nearly closed at the cam high point on the distributor. I also noted that they were badly pitted and OLD. I dug through my box of old VW parts and found an old Performance 009 Distributor that had a nearly new set of points. My luck it was a perfect match. Not so lucky actually because it is after all a VW engine. A Type IV pancake engine. I set my points to .015. The book says .016. After setting all the stuff back to original I only had to bump things a tiny bit to smooth it out and the beastie now runs smooth and idles as it should. Took it out for a spin and it runs great.
I still have that annoying blinking light on my dash. It is actually a bad switch on the E Brake handle. The switch is actually on the body in a very difficult place to get to but it is for sure a busted switch. It is a common switch so should be easy to find a new replacement with all my VW parts. This type of switch is used for trunk lights and engine compartment lights when you open them in the dark. I need to fish out the wires and then connect in a new switch and it should be just perfect.
All the lights work except the low head light on the drivers side. I figured it was a minor issue until I got the rest of the problems ironed out.
Looks like things are shaping up nicely.
Pete :)

Wednesday, August 14, 2013
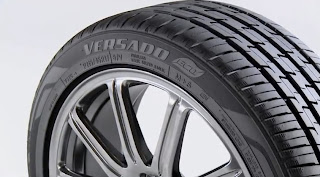
Toyo Versado Eco Tires
Got my Toyo Versado Eco Tires mounted today. Drove in with a nasty low idle issue but it made the trip. Runs great above idle. Car is very responsive and handles well. Ooops. after leaving the tire shop I noticed a nasty front shimmy that was not there before. Seems like they screwed up on the balance job. On heavy acceleration and around 65 mph I get the shimmy. While its shimmying the car still tracks straight and true. So it leads me to think a crappy balancing job. Other than that the tires are great so far. Quiet and smooth. But when it starts to shimmy it sucks. I got most of my light issues fixed. Most but not all. When I turn on the key I have a blinker light on the dash blinking all the time even when the blinker is not on. When I turn the blinker on for the left side it works great but not on the right. Head lights work except one is burnt out on the low light. Easy fix. I have a spare. Running lights all work. Horn works. Radio works. Reverse lights work. Brake lights work. The guy had a single filament light in a dual filament socket. Ouch. Now both brake lights work.
Still figuring out my idle issue too. Replaced some old crappy hoses in hopes of fixing the issue but still no go. They needed replaced anyway so it would have been done sooner or later. Now is good.
Still figuring out my idle issue too. Replaced some old crappy hoses in hopes of fixing the issue but still no go. They needed replaced anyway so it would have been done sooner or later. Now is good.

Here is a video of the Toyo Versado Eco Tires.
Monday, August 12, 2013
914 is
Hey, my 914 is now legal. Went to the DMV today after work. Dang, I should have gone to the DMV 30 minutes before closing before. Got through in less than 20 minutes. Amazing, because it was a walk in thing. I then stopped at the insurance company and put it on my insurance.
Fixed the brake pedal dust boot. Checked brakes and blinkers. Well, I guess all my electrical is not up to snuff. I am now getting a blinking light on my dash when I turn on the power. No brake lights and only one side has proper blinkers. Drivers side has the blinker blinking the wrong light and its not even blinking brightly.
Going to track down the problem so I can drive. Mostly I need the brake lights to work. Will check the switch tomorrow. Easy enough to do. Fuses are all good. Some wires some where must be out of whack. Gotta track them down. Sucks.
Anyway I found a nice little video that is a three day highlight of the past EVCCON 2013. So if you have not seen it, here it is.
Sunday, August 11, 2013
73 Porsche 914 1.7 EV Project
Well the Porsche is now cleaned and ready for the DMV and ready for some new Toyo LRR tires. All the paper work should be done by Thursday this week as well as an alignment and new tires. I started to wax the beast and since there is some oxidation on the trunk lid you can see the before and after effects of doing a color buffing then waxing. Since it has no clear coat it needs to be washed and waxed on a regular basis. This is all in preparation for an AC-75 and 46 CALB 180ah cells if I go with the 144 volt system. Video is planned soon for the engine so I can advertise it for sale for someone who needs a 914 engine ready to go.
I just wanted to be sure all the components worked before tearing out the engine. Here are my latest pictures I took this evening on the front grass.


I just wanted to be sure all the components worked before tearing out the engine. Here are my latest pictures I took this evening on the front grass.


Friday, August 9, 2013
Porsche 914 Pedal Assembly
Yesterday I finished the pedal assembly for the 914 and put it all together and installed. Once I got it installed I saw my dust boot for the master cylinder lying on the floor board next to the seat. Aaaaaaaaaaaa! Now I have to take it part way apart to get it back on. It always happens. The rebuild went smoothly for the assembly except I had to be a little creative to get the roll pin installed. Just hammering it home did not work. So I took a small c clamp and tightened it then tapped the top of the c clamp until it loosened up a bit. Crank it some more and tap the top then crank more and tap more until the roll pin was fully installed. It actually worked great. It took a bit of time and moved it a tiny bit at a time but it did not take terrible long. I have new rubber pedal covers coming from Pelican parts as well as a few other things.
This evening after work I was able to finish bleeding the brakes with the help of the wife. That did not take long. Smooth and easy. Brakes feel great. I then decided to take it for a spin. As you may recall the person I purchased the car from drove it into his garage then was unable to restart the car for 3 years. Then I come into the picture and purchase the car, not running. Once I got it home I proceeded to charge the battery and then try to start the car. Upon looking and listening and checking hoses and vacuum lines I found one bad line. It was the vacuum line to the distributor. I clipped the ends and reinstalled the vacuum line and lo and behold it started and even stayed running. Mind you not the best but remember it has gas that is at least 3 years old and no fuel has run through the engine for that long.
I decided after bleeding the brakes to take it for a spin. The engine stayed running but was slow and sluggish only at idle. I turned on the head lights and backed out onto the road and let er rip. Down the road 3/10ths of a mile later I was on the return trip. Before I got back I was easy doing 70 and only in 3rd. I once again took the same route straight up the road full bore and before I got 3/10ths of a mile I was doing 70 in 3rd. Man this sucker moves nice for an old car but it still has its punch. I also noticed that the car stayed running better after taking it out for a bit of a run. I guess it needed its jets cleaned a bit. It is idling much better now even after that short drive. Can't wait to see how it does after a week or so.
Yes, I am going to drive it a bit before removing the engine for the conversion. I need to be sure the engine is in excellent condition to sell off as a turn key engine.
It is however time to buy my AC-75. I am still struggling with which setup to use. Do I go with the higher amperage and lower voltage setup or do I go with the new 144 volt 500 amp controller.
The steering was a bit squirrelly but I managed to hold it well. Seems like I don't remember these being so touchy. Maybe I forgot since High School. Maybe it just needs an alignment. New LRR tires coming this week along with an alignment.


Subscribe to:
Comments (Atom)